Showing posts with label vulcan carb. Show all posts

The guy was not a flake!

    Hahaha!  The guy I traded bikes with ended up riding his FZ1 an hour down to me last night.  Very nice guy and I love the new FZ1 so far.  I won't be able to really take it out until this weekend after it's registered though. :(  I've never really been attached to a bike but I will admit it was sort of sad seeing the Vulcan driving off.  I always knew it was loud but never really how loud until we listened to the new owner riding off for blocks. LOL  Well, here is the new bike, 2001 Yamaha FZ1.

Post Title

The guy was not a flake!


Post URL

http://all-design-motorcycle.blogspot.com/2010/08/guy-was-not-flake.html


Visit MOTORCYCLE DESIGNS for Daily Updated Wedding Dresses Collection

Possibly a new bike coming...

    After putting in all of the work into my Vulcan and getting it to where I wanted it, it makes sense to get rid of it and get something else right?  Seems to be my pattern anyway.  I think I've liked working on bikes more than riding them but now I'm getting to the point where I just want to ride and not have something that I feel the need to modify year round.  My goal was to sell my bike and use the money to build an early 70's Honda chopper for a winter project.  But a guy emailed me this week that got me thinking in a totally new direction.  He offered to trade me for his 2001 Yamaha FZ1.  I almost said "no thanks" but after thinking about it and reading up on the FZ1 I think it'd be a perfect bike for me.  He's done some modding to it already and I don't see myself doing much more to it.  It'll be a bike I can walk past in the garage and say, "I'm going for a ride!", instead of  "What can I do to the bike next?"  I love projects but sometimes the bikes end up being in constant project mode.  So,  I'm really hoping this guy does not flake out on me and hopefully the exchange happens this weekend.  I've never been on a FZ1 but I can't find a single bad review on it so I'm excited to get on it.  If I hate it I'll sell it come Spring and be back to square one.

    But what to do this winter when I'm stuck in the house?  I think I'm going to try my hand at building custom handlebars.  I was going to build a set of ape hangers for the Kawasaki this winter but instead I might just start tinkering with building some generic bars and see how they turn out.  Who knows, maybe I can end up selling them and having a little side business.

    To be continued....

Post Title

Possibly a new bike coming...


Post URL

http://all-design-motorcycle.blogspot.com/2010/08/possibly-new-bike-coming.html


Visit MOTORCYCLE DESIGNS for Daily Updated Wedding Dresses Collection

Finished!

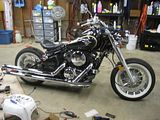
    Here are the pics from tonight that I promised.


Post Title

Finished!


Post URL

http://all-design-motorcycle.blogspot.com/2010/04/finished.html


Visit MOTORCYCLE DESIGNS for Daily Updated Wedding Dresses Collection

New seat

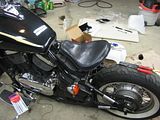
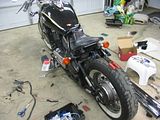
    Ordered a Vulcan seat kit from Blue Collar Bobbers . The quality of their kit is awesome but the Drifter is different from a standard Vulcan so I had to do some cutting and stuff. Also you can see how I relocated the stock turn signals.

    Photobucket Photobucket Photobucket

Post Title

New seat


Post URL

http://all-design-motorcycle.blogspot.com/2009/10/new-seat.html


Visit MOTORCYCLE DESIGNS for Daily Updated Wedding Dresses Collection

Installing a jet kit on a Kawasaki Vulcan 800.

    This process is what I had to do on my 2002 Kawasaki Vulcan Drifter 800. It should be the same for all 800 models from what I can tell. Also, some Harley Davidson bikes use this same carb, or a very similar one from the same manufacturer, so this should help the Harley crowd out as well.

    I used a DynoJet jet kit part# 2186. I have a K&N filter and Hard - Krome pipes on the bike. For the most part, any jet kit you get will be done exactly like this.

    Your first order of business is to remove the carb from the bike. Sorry I do not have a write up for that but it wasn't that hard.

    With the carb off the bike take it to a work bench or table. There will be some springs and smaller parts so don't do it over grass or gravel or something silly where you'd lose a part if it fell to the ground. Or maybe stopping in the middle of your product to crawl around on the ground for an hour looking for a part the size of a needle is your thing?

    Now, let the fun begin!

    Needle Installation

    The first step in removing the needle is to remove the black plastic cover, outlined in yellow in the image. It's held in by 4 phillips head screws. Be sure to use the correct size screwdriver on these. Mine were a little tight and I could see these being a possible disaster is you stripped them.


    Once the cover is off here is what you'll see.


    Remove the spring, shown above, and the vacuum piston, shown below. Inside the vacuum piston there will also be a needle and a plastic needle holder.


    This is what you should be left with.


    In this picture I've outlined in yellow, the needle, and needle holder. The vacuum piston is the item in the upper right corner of my work mat.


    Next you'll take the new needle, spacers, and e-clip, included with the jet kit, and follow the instructions. The new needle will have several grooves cut into the top of it. For my application, it called for an e-clip in the #3 groove with 2 washers resting on top of it.

    You can now reassemble the vacuum piston, needle, needle holder and cover. The installation is simply the opposite of removal.


    Jet Installation

    Now for the installation of the new jet.
    First, turn the carb upside down and locate the 4 phillips head screws, circled in yellow below, holding the float bowl on. Remove the screws using the proper screw driver making sure not to strip them.


    Once the screws are removed simply remove the float bowl. Below is what the carb will look like with the float bowl removed. I've circled the jet in yellow.

    The old jet is easily removed using an open wrench and the new jet is simply screwed right back into the same threads the old one came out of. Some kits come with different size jets so be sure to read the instruction to determine what jet to use. The jet size should be stamped right on the jet.

    Put the float bowl back on and secure it with the 4 screws and move onto the next item.


    Pilot (Fuel Mixture) Screw Adjustment

    The final step to the jet kit install is to adjust your pilot screw. If you skip this step you'll have a very poor running bike.

    First, turn the carb upside down and locate the metal mixture screw cap ,circled in yellow in the next two pictures. Once the cap is located drill a hole in it (the jet kit comes with the drill bit). NOTE: STOP DRILLING THE SECOND IT GETS THROUGH THE CAP OR YOU'LL DAMAGE THE MIXTURE SCREW UNDER IT!


    Next screw a screw (the jet kit came with a screw) into the hole, just enough to bite into the cap.
    The yellow box in the picture below shows the screw in the hole.


    Next, use a pair of pliers to grab onto the screw and pull. The cap should pop right off with ease.

    Once the cap is off adjust the screw per your instructions.


    Ta-da! Your new jet kit is in and all that is left to do is toss the carb back on and enjoy a smooth running bike!


Post Title

Installing a jet kit on a Kawasaki Vulcan 800.


Post URL

http://all-design-motorcycle.blogspot.com/2009/08/installing-jet-kit-on-kawasaki-vulcan.html


Visit MOTORCYCLE DESIGNS for Daily Updated Wedding Dresses Collection

Popular Posts

My Blog List

Blog Archive